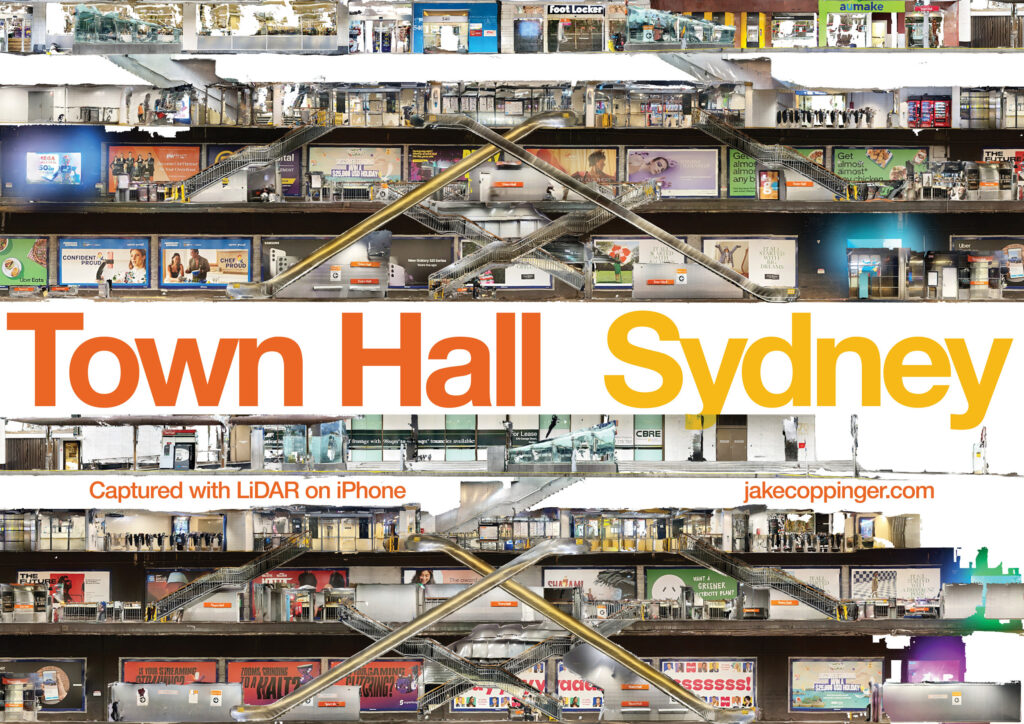
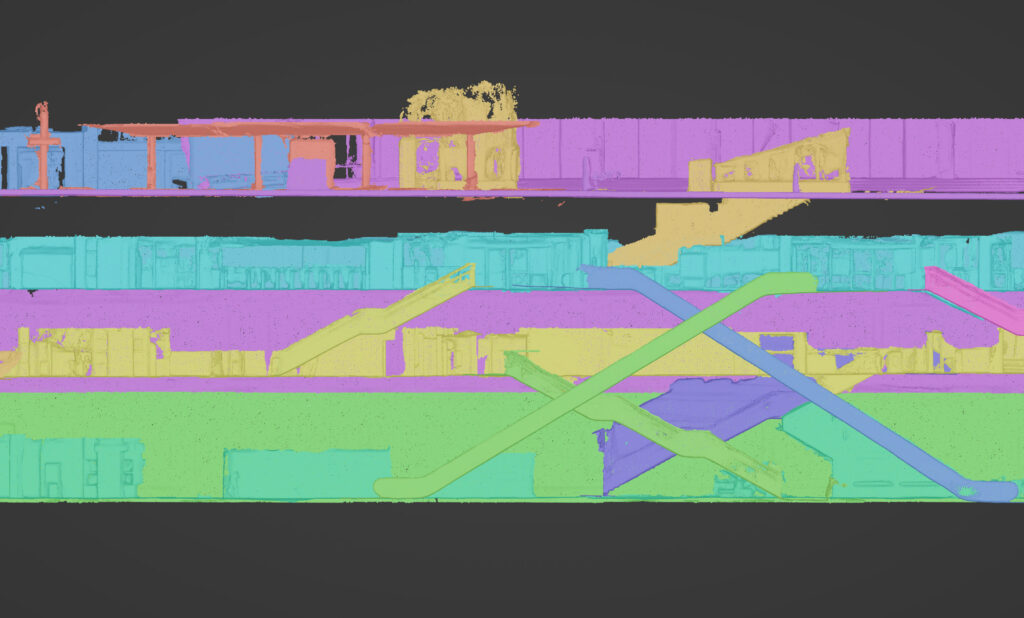
The above poster is an orthographic (ie. no perspective) render of a 3D model of the underground train station.
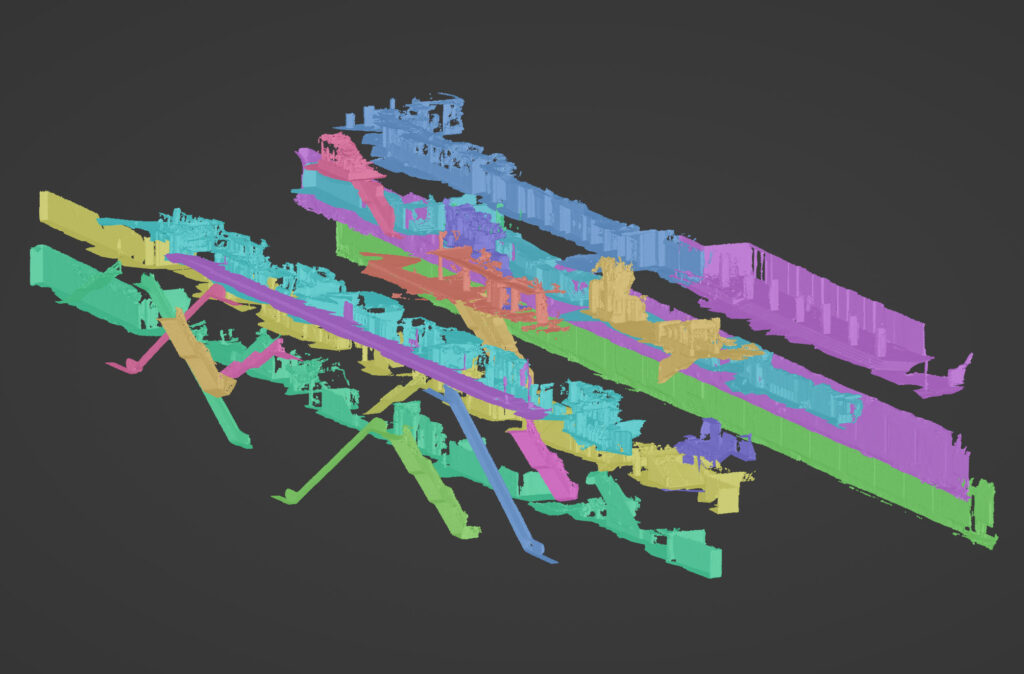
I created a 3D model by walking around the station holding an iPhone 14 Pro running the 3D Scanner App, combining the segments in the 3d modelling software Blender and rendering it out as an image.
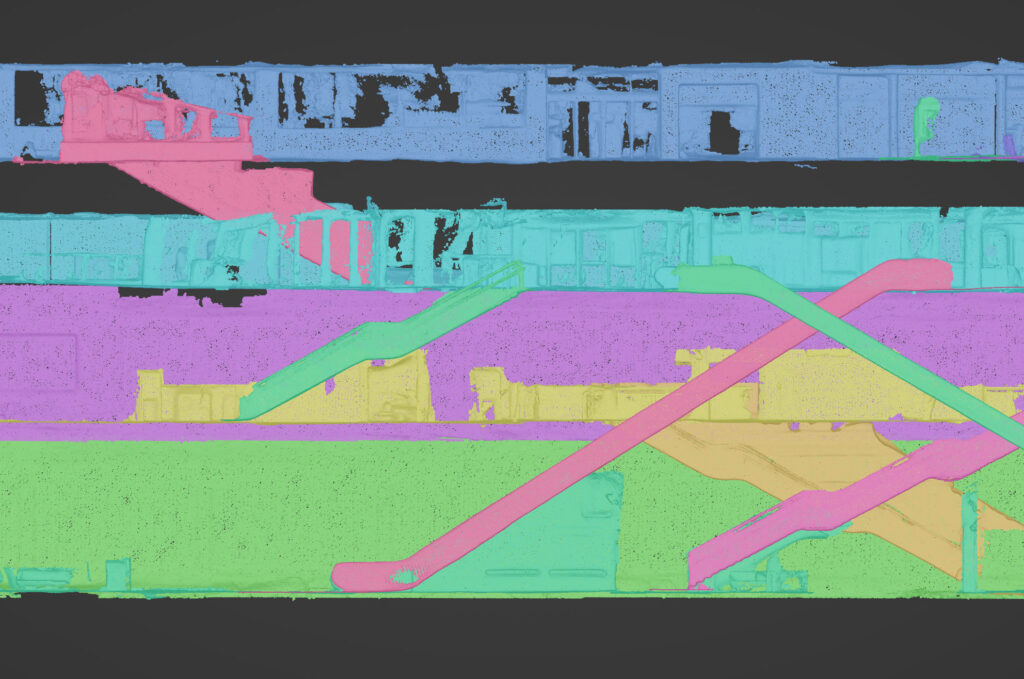
Aren’t the escalator and staircase crossovers a beautiful symmetrical pattern? I had no idea that’s how they were arranged. I think it’s a wonderful way to visualise architecture.
If you would like to download and print your own A3 poster, here are some high resolution copies. All are licensed CC BY-NC 4.0.
- 9921 × 7016, 600dpi JPEG, ~32MB: files.jakecoppinger.com/town-hall-station-poster/town-hall-station-poster-jake-coppinger.jpg
- PDF optimised for computers (RGB, interactive, ~4MB): files.jakecoppinger.com/town-hall-station-poster/town-hall-station-poster-jake-coppinger.pdf
- PDF optimised for printing (CMYK, marks & bleeds, ~50MB): files.jakecoppinger.com/town-hall-station-poster/town-hall-station-poster-jake-coppinger-print.pdf
Enjoy!
Read on if you’d like to learn more about how to create a model of your own local train station or a multi-story building.
Table of contents
Behind the scenes
Overview of method
- install the 3D Scanner App on an iPhone that supports LiDAR (iPhone Pro 12 or later, 2020+ iPad Pro)
- slowly walk around with the app to generate a 3D LiDAR model
- importing the 3D models into Blender
- align the models
- cleaning up any “noise” and chopping off half of some objects
- render the model to an image
- create a nice poster in Adobe InDesign!
Detailed method
Setting up your iPhone
These instructions are similar to those for my blog post on Generating aerial imagery with your iPhone’s LiDAR sensor.
I recommend using the app titled 3d Scanner App as it allows considerable customisation of the scan settings, though other scanning apps like Polycam would also work. It allows finishing a scan and extending later, though this can be buggy. I haven’t had a crash during capture – I’ve had Polycam crash halfway through a large scan losing all data.
Download 3d Scanner App and use the LiDAR Advanced mode. I recommend the using the following options for scanning streets:
- Confidence to low if you need the maximum 5 metre range for the sensor, otherwise set it to medium for a less noisy model
- Range to 5.0 metres
- Masking to None
- Resolution to 50mm (the lowest – for large models like buildings or streets)
In the app settings, make sure to set:
- Units to metric
- GPS can be turned on but likely won’t help you underground!
Capturing the model
Note that any commercial photography in a train station will require paperwork and special permission. Amateur/hobbyist/student use of a hand-held mobile device appears to be permitted in Sydney train stations, just treat it like taking a photo/video for Instagram or Tiktok – don’t photograph people and keep an eye on your surroundings.
The safety precautions are common sense, but have a read. Be careful not to cross over the yellow line when scanning. People will introduce artefacts into the model, so go in off peak or on a weekend to minimise crowds. The resolution and accuracy of the LiDAR scanning is not high enough to present any security concerns (any more than an Instagram photo).
When scanning, walk slowly with a sweeping motion to increase the maximum scanned width. If the area is wide enough to require a grid pattern, follow the same shape as a drone survey (an S-shape with considerable overlap). Not enough overlap or higher speeds mean the linear passes don’t connect correctly due to (I assume) inertial measurement unit drift.
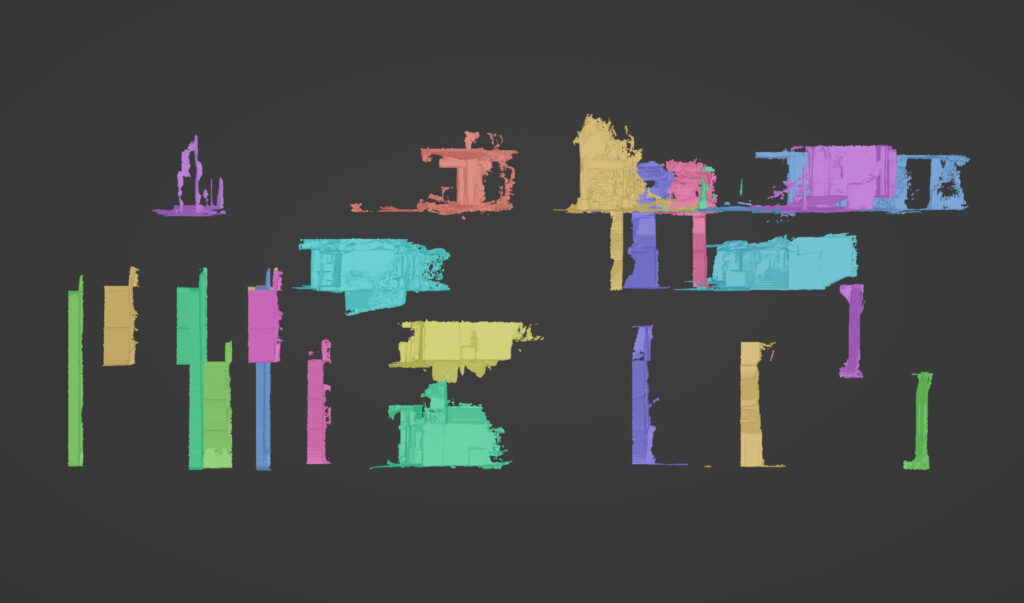
Aligning and cleaning the models
You will likely need to do multiple takes of your desired building, and then combine them together.
Share your models from 3D scanner app as OBJ via Airdrop (or your preferred method), decompress the ZIP file and then import the OBJ into Blender (File -> Import -> Wavefront (.obj)).
Some basic Blender skills come in handy here – it’s not an easy program to use, and I am no expert. If you haven’t used it before I recommend following a beginner blog post or video tutorial. A few specific tips:
- Make liberal use of the numpad preset views: 1 for front on, 3 for side view, 7 for top, and 5 for toggling perspective
- If you don’t have a numpad you will need to enable numpad emulation, see instructions at https://www.hack-computer.com/post/how-to-emulate-a-third-mouse-button-and-keypad-for-blender
- To remove noise or parts you don’t want, select the object, change into edit mode (tab key), and then change the Viewport Shading to Wireframe (with the globe button in the top right). Dragging with the left mouse button will select areas, or click
cto drag a circle to select vertices (with +/- keys enlarging the circle).- Changing the shading to Wireframe means that you can select vertices “hiding” behind others that may not be directly visible
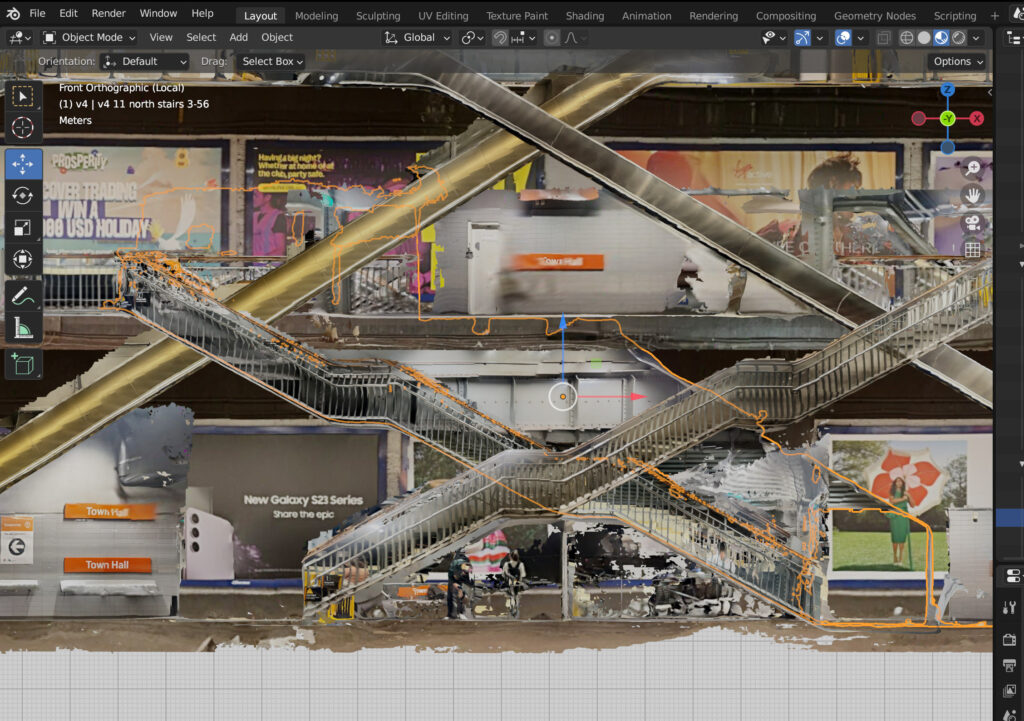
- I couldn’t figure out how to disable perspective and get the framing I wanted in a proper render, so I did a Viewport render with the background set to white, Material Preview as the Viewport Shading mode and
Toggle X-Rayto remove the grid- The background still wasn’t perfectly white even though I set it to be, I had to use levels in Photoshop to get the background #FFFFFF. This may just be an error on my part!
Possible future improvements
- Capturing pointclouds instead of meshes, aligning them in Cloudcompare (I believe there are tools for aligning pointclouds), then either rendering straight to an image or generating a mesh and rendering only faces/normals facing the camera
- Reducing drift in capturing models. This would be algorithm heavy; maybe utilising survey markers or just known positions in a station, using Record3D, exporting sequences of
.objmodels (1 per frame), then constructing offline. - A cross section from the north or south would be interesting! (this view is from the west looking east)
- Is it possible to create an accurate model with less takes? This would require less stitching in Blender
- Are there ways to create a full 3D model, then just not render faces/normals that aren’t facing the camera?
- Better yet, not rendering faces/normals that are less than x degrees incident to the camera to reduce noise for flat surfaces
- How to handle glass surfaces better (LiDAR isn’t great with glass out of the box)
- 3D printing models
Please let me know if you use this as inspiration for modelling stations elsewhere!
Related/further reading
- Catharia O, Richard F, Vignoles H, Véron P, Aoussat A, Segonds F. Smartphone LiDAR Data: A Case Study for Numerisation of Indoor Buildings in Railway Stations. Sensors (Basel). 2023;23(4):1967. Published 2023 Feb 9. doi:10.3390/s23041967: https://www.researchgate.net/publication/368448078_Smartphone_LiDAR_Data_A_Case_Study_for_Numerisation_of_Indoor_Buildings_in_Railway_Stations
- Great tips for better 3D scans: https://docs.3dscannerapp.com/
- 3D maps (orthographic projection) of every London Underground station
Leave a Reply